Save to Pinterest
 There's something about the smell of peanut butter hitting a hot oven that instantly transports me back to my grandmother's kitchen on lazy Saturday afternoons. She'd let me press the fork into each ball of dough, creating those perfect crosshatches, and somehow my slightly crooked patterns always tasted better than the perfectly uniform ones. These cookies became my go-to when I needed something that felt both comforting and impressive—soft centers that stay chewy for days, if they last that long.
I made these for my neighbor's potluck once, and I watched someone take a bite and close their eyes like they'd just tasted pure nostalgia. That's when I realized these cookies are more than just a dessert—they're edible comfort, the kind that bridges conversations and makes ordinary evenings feel special.
Ingredients
- All-purpose flour: The foundation that keeps these cookies tender without being cake-like; sifting isn't necessary, but I always whisk it to break up any lumps.
- Creamy peanut butter: This is where the soul of the recipe lives—don't skip the good stuff, because cheap peanut butter means a greasy, flat cookie.
- Unsalted butter: Using unsalted lets you control the salt level and ensures the peanut butter flavor stays the star.
- Both sugars together: The granulated sugar adds crispness at the edges while brown sugar keeps the centers impossibly soft and chewy.
- Egg: Your binding agent and the secret to that slight lift that makes each cookie feel delicate.
- Vanilla extract: A quiet player that rounds out the sweetness and prevents the cookies from tasting one-dimensional.
- Baking soda and baking powder: The dynamic duo that gives you spread without collapse and a tender crumb.
Tired of Takeout? 🥡
Get 10 meals you can make faster than delivery arrives. Seriously.
One email. No spam. Unsubscribe anytime.
Instructions
- Set the stage:
- Preheat your oven to 350°F and line two baking sheets with parchment paper. This temperature is the sweet spot—hot enough to create golden edges but gentle enough to leave centers soft.
- Marry your dry ingredients:
- Whisk together flour, baking soda, baking powder, and salt in a medium bowl, then set it aside. Whisking incorporates air and distributes the leavening agents evenly, which is what prevents dense, heavy cookies.
- Cream the butter and sugars:
- Beat the softened butter with both sugars for about two minutes until the mixture is light and fluffy. You're essentially aerating the dough here—this is what gives you that tender bite later.
- Bring in the wet ingredients:
- Add the peanut butter, egg, and vanilla to the creamed mixture and beat until everything is completely combined. Make sure there are no streaks of unmixed peanut butter, or you'll have inconsistent texture in your final cookies.
- Fold in the dry ingredients:
- Add the flour mixture gradually and mix just until you don't see dry flour anymore. Overmixing at this stage toughens the dough, so stop as soon as everything is incorporated.
- Shape and decorate:
- Scoop about one tablespoon of dough per cookie and roll into balls. If you want, roll each ball in granulated sugar for a subtle crunch on the exterior.
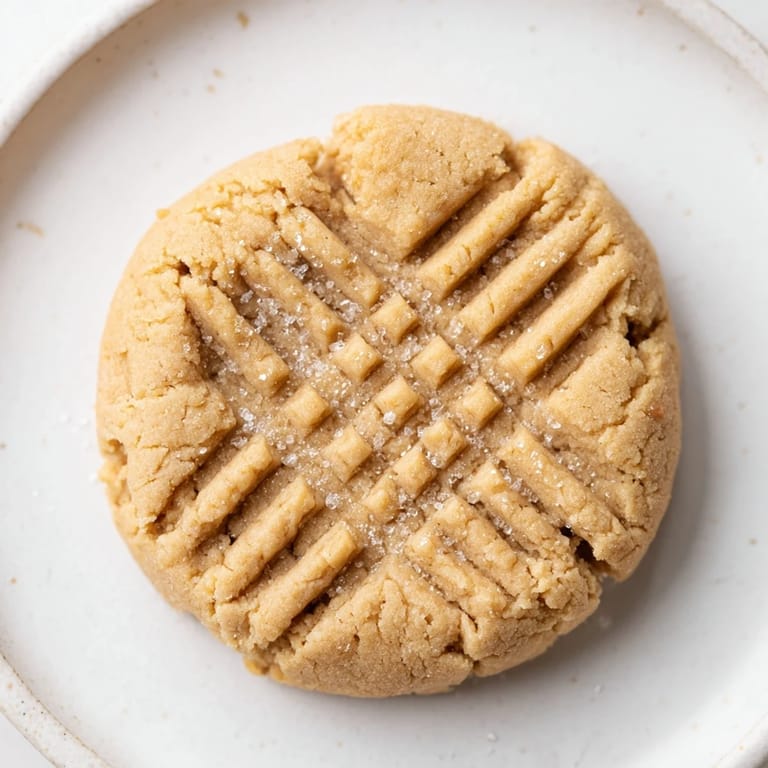
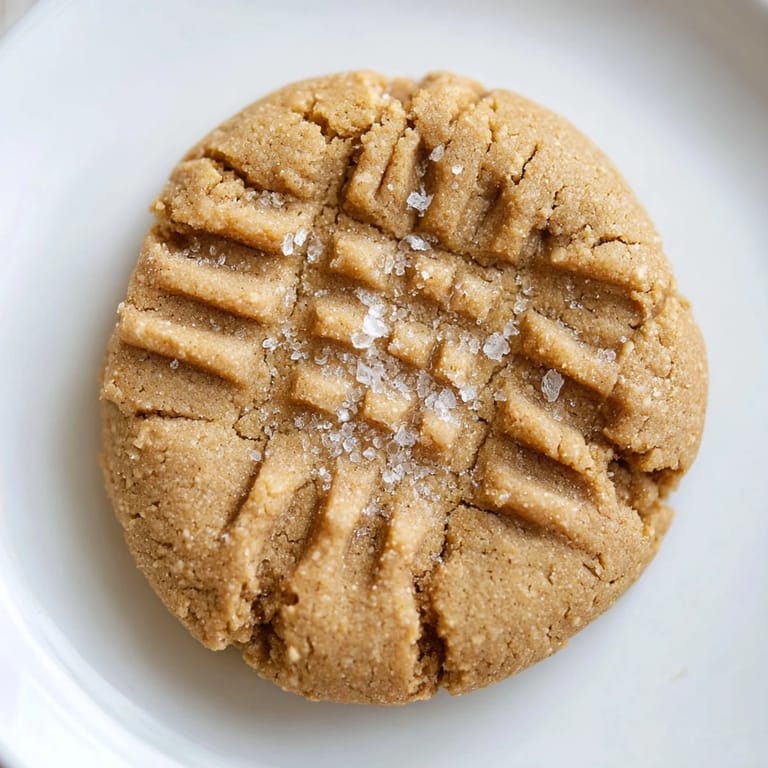
- Create the signature crosshatch:
- Place balls on your prepared baking sheets about two inches apart, then use a fork to press down twice in a crisscross pattern. Press gently but firmly—you're flattening the cookie slightly and creating visual appeal at the same time.
- Bake to golden perfection:
- Bake for 10 to 12 minutes until the edges are lightly golden but the centers still look slightly underdone. The cookies will firm up as they cool, and this timing ensures maximum chewiness.
- Cool with patience:
- Let cookies rest on the baking sheet for five minutes before transferring to a wire rack. This five-minute window is crucial—it allows them to set just enough to move without falling apart, but not so long that they harden completely.
 Save to Pinterest
 I learned the hard way that cooling times matter just as much as baking times. I pulled a batch off the sheet too early once and watched them crumble in my hands, but that mistake taught me the five-minute rule that now guarantees success every single time.
Why This Recipe Works
The ratio of peanut butter to flour is what makes this recipe sing. Too much flour and you get a dense, cake-like texture; too little and the cookies spread into flat discs. This recipe walks that line perfectly, delivering cookies that hold their shape while staying soft on the inside. The combination of both granulated and brown sugar is also key—granulated encourages spread and crispness at the edges, while brown sugar's molasses content keeps the centers fudgy and moist.
Storage and Make-Ahead Magic
These cookies stay fresh in an airtight container for up to five days, which makes them perfect for preparing ahead of time. I often make a double batch on Sunday and portion them out for the week—they're my emergency snack when afternoon hunger strikes or when I need a quick gift for a friend. You can also freeze the unbaked dough balls for up to three months; just add a minute or two to the baking time if baking from frozen.
Elevating Your Batch
Once you've mastered the basic recipe, the variations are endless. Chunky peanut butter adds texture and a more pronounced peanut flavor, while chocolate chips transform these into something that feels almost decadent. I've experimented with adding a pinch of cinnamon, swirling in a little honey, or topping them with fleur de sel before baking—each small change adds its own personality.
- Dip the crosshatched edges in melted chocolate for an elegant touch that looks homemade in the best way.
- Add a teaspoon of espresso powder to deepen the peanut flavor without adding coffee taste.
- Press a single chocolate chip or piece of candied ginger into the center of each cookie before baking for a hidden surprise.
 Save to Pinterest
 These peanut butter cookies have become my answer to almost every occasion—a quiet moment with coffee, a gift that says I was thinking of you, a dessert that needs no apology. There's honesty in simplicity, and this recipe celebrates that beautifully.
Frequently Asked Recipe Questions
- → What creates the signature crosshatch pattern?
Pressing the dough balls twice with a fork before baking forms the classic crisscross design and slightly flattens the cookies.
- → How can I make these cookies chewier?
Baking them for 10–12 minutes ensures gooey centers. Reducing baking time slightly will keep them softer.
- → Can I substitute crunchy peanut butter?
Yes, using chunky peanut butter adds texture and little nut pieces throughout the cookies.
- → What is the best way to store them?
Store cooled cookies in an airtight container at room temperature to maintain softness for several days.
- → Can I add mix-ins to these cookies?
Incorporating chocolate chips or chopped peanuts before baking offers delightful variations in flavor and crunch.