 Save to Pinterest
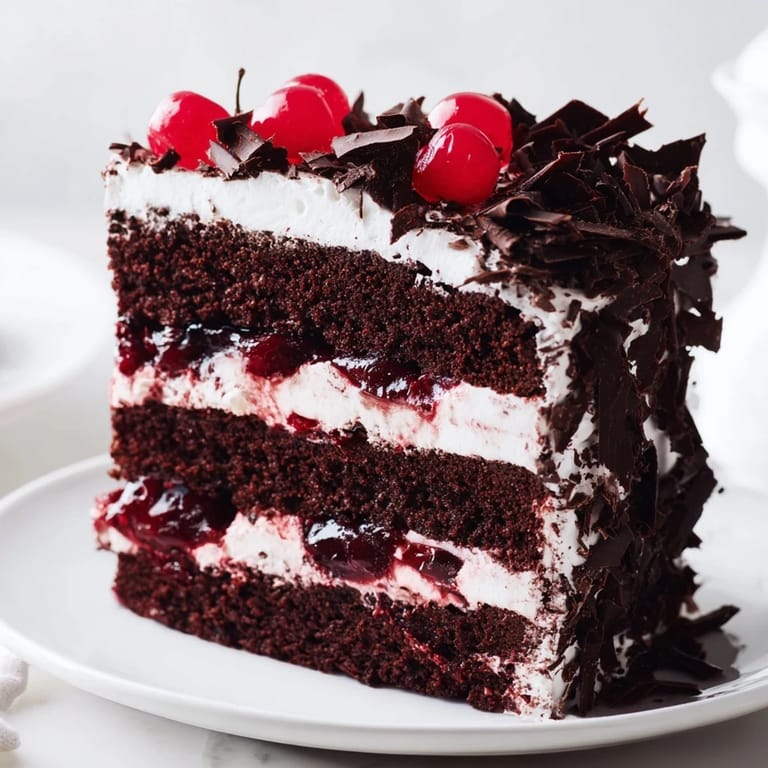
 The first time I tasted Black Forest Cake was at a small patisserie in Stuttgart, where the baker showed me how the thin chocolate layers could hold up to the weight of cherries and cream without collapsing. Years later, I was determined to recreate that magic in my own kitchen, and what surprised me most was how the boiling water transforms the batter into something impossibly tender. That single technique changed everything for me, turning what seemed like an intimidating German classic into something I could actually master.
I made this for my neighbor's birthday last spring, and she stood in my kitchen watching me shave the chocolate with a vegetable peeler, amazed that something so restaurant-worthy could come from such a simple tool. The moment she took that first bite and closed her eyes, I knew the effort was worth it. That's when I understood this cake isn't just dessert—it's the kind of thing people remember.
Ingredients
- All-purpose flour: Sifting it with the cocoa and leavening agents ensures no lumps hide in your batter, which is especially important when you add boiling water later.
- Unsweetened cocoa powder: Don't skip the sifting step here either, as clumps in the batter can create dry spots in the finished cake.
- Granulated sugar and boiling water: This combination creates that impossibly tender crumb; the water seems counterintuitive but trust it completely.
- Heavy whipping cream: Must be cold straight from the fridge, or it won't whip properly no matter how long you beat it.
- Dark sweet cherries: If using fresh, pit them carefully to avoid losing juice, but jarred cherries in light syrup are completely authentic and honestly more reliable.
- Dark chocolate for shavings: Keep it at room temperature briefly before using the peeler, or it shatters; too warm and it'll smear instead of curl.
Tired of Takeout? 🥡
Get 10 meals you can make faster than delivery arrives. Seriously.
One email. No spam. Unsubscribe anytime.
Instructions
- Mix your dry ingredients with intention:
- Sift flour, sugar, cocoa, baking powder, baking soda, and salt together into a large bowl. This isn't just about combining—you're aerating the cocoa and breaking up any clumps before they ruin your texture.
- Create the base batter:
- Add eggs, milk, oil, and vanilla, then beat until the mixture looks smooth and glossy. The batter should be thick and cling to the beaters slightly, showing you've developed enough structure.
- Transform with boiling water:
- Gradually pour in boiling water while mixing; the batter will become thin and almost soup-like, but this is exactly what creates that tender crumb. Mix until just combined and don't overthink it.
- Bake with patience:
- Divide between two prepared pans and bake at 350°F for 30–35 minutes. The cake is done when a toothpick inserted in the center comes out clean with a few moist crumbs clinging to it.
- Cool properly before assembly:
- Leave the cakes in the pans for 10 minutes so they set enough to unmold without tearing, then cool completely on wire racks. Warm cake will melt your whipped cream and absorb the cherry filling unevenly.
- Prepare the cherry filling:
- Combine cherries, cherry juice, and sugar in a saucepan, bring to a simmer, then stir in the cornstarch mixture. Cook just until it thickens—about 2–3 minutes—then cool completely before using.
- Whip the cream to stiff peaks:
- Beat cold cream with powdered sugar and vanilla until you see defined, firm peaks when you lift the beaters. This usually takes 3–4 minutes on high speed with an electric mixer.
- Slice each layer horizontally:
- Using a serrated knife, carefully split each cake layer in half to create four layers total. Take your time here; a gentle sawing motion works better than trying to cut through in one motion.
- Layer with purpose:
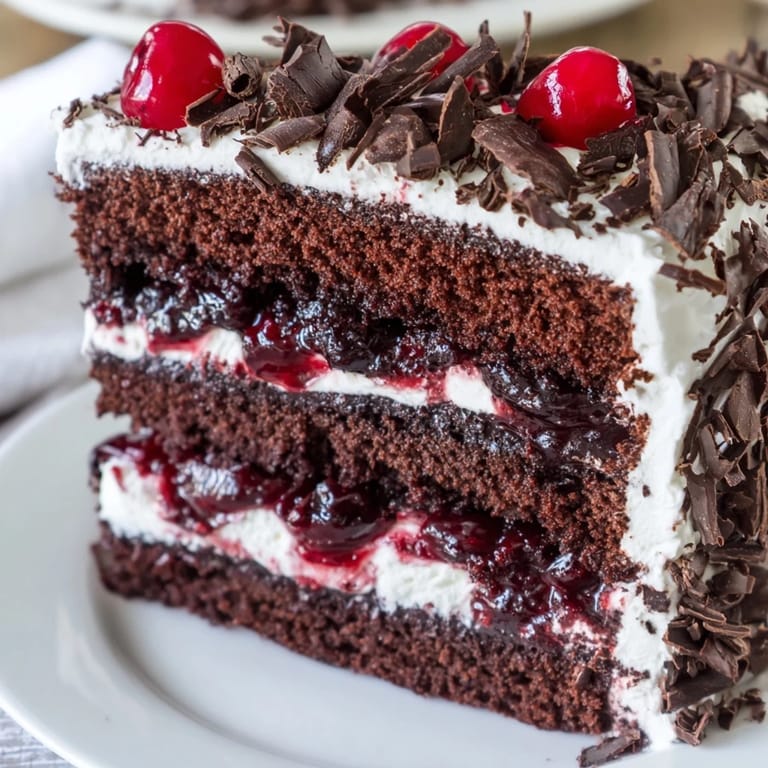
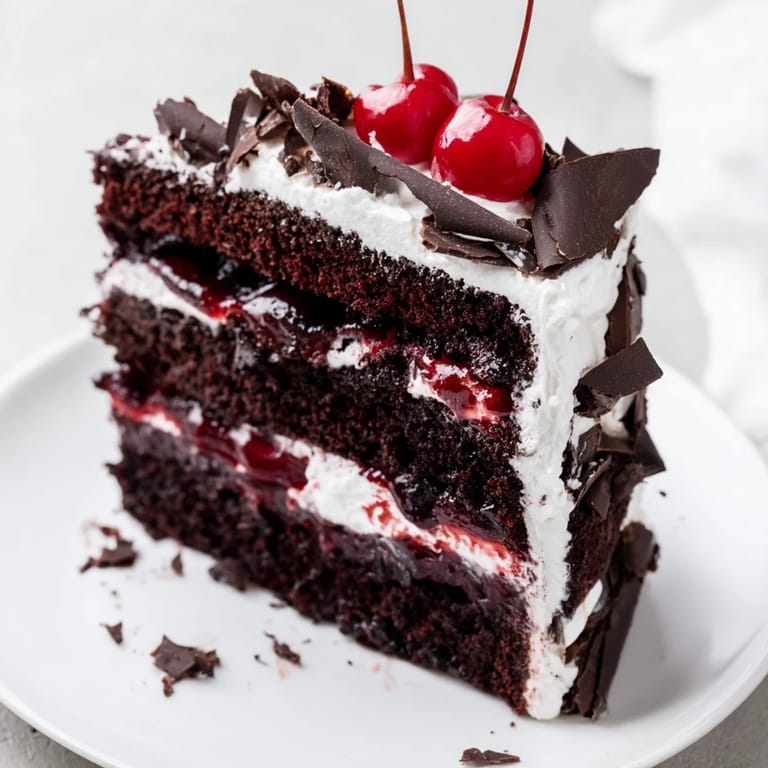
- On your serving plate, place the first cake layer, brush lightly with cherry syrup, then spread a layer of cherries, followed by whipped cream. Repeat this pattern, finishing with a thick layer of cream on the top and sides.
- Decorate and chill:
- Top with chocolate shavings and fresh or maraschino cherries, then refrigerate for at least an hour. This chilling time lets everything set and makes the cake much easier to slice cleanly.
 Save to Pinterest
 I remember the quiet satisfaction of cutting into this cake after it had chilled overnight, seeing those perfect layers hold their shape as the knife moved through. That moment when something you built actually works the way you imagined—that's when baking stops being a task and becomes something you genuinely love doing.
About Those Chocolate Shavings
The vegetable peeler trick changed my entire approach to chocolate decoration. Instead of melting chocolate or grating it roughly, I keep a dark chocolate bar slightly below room temperature and drag a peeler along the flat side, creating those beautiful, delicate curls. If your chocolate is too cold it shatters, but if it's too warm it smears into unusable pieces. The sweet spot—just slightly pliable—takes maybe 30 seconds to achieve once you learn to feel it.
Cherry Choices and Variations
Fresh dark sweet cherries are glorious when you can get them, but I've come to love jarred sour cherries in light syrup just as much. They're more traditional in Germany, they're available year-round, and honestly, they taste less cloying than some fresh varieties. The kirsch brandy adds a subtle sophistication, but it's completely optional—extra cherry syrup brushed on the layers gives you all the flavor you need.
Timing and Make-Ahead Strategy
You can bake the cake layers up to two days ahead and store them wrapped in plastic wrap, which actually gives the flavors time to develop. The cherry filling keeps for three days refrigerated. Whip the cream fresh the day you assemble, or it'll separate and weep. Assemble the whole cake at least six hours before serving, preferably overnight, so everything sets and the flavors meld together beautifully.
- The cake actually tastes better on day two or three, when the layers have absorbed just enough cherry syrup and the flavors have deepened.
- If you're short on time, assemble it in the morning for evening service—six hours is the minimum for stability.
- Keep it chilled until just before serving; this cake doesn't improve at room temperature and will start to weep if left out too long.
 Save to Pinterest
 This cake has a way of becoming the thing people ask you to make again and again. Once someone tastes it fresh from your kitchen, they understand why it's been a European favorite for generations.
Frequently Asked Recipe Questions
- → What chocolate is best for the cake layers?
Unsweetened cocoa powder offers deep chocolate flavor in the cake, while dark chocolate is ideal for shavings to garnish and add richness.
- → How do I achieve stiff peaks with whipped cream?
Chill the heavy cream well before whipping and beat on high speed until the cream holds firm peaks without overwhipping into butter.
- → Can fresh cherries be used for the filling?
Yes, fresh or jarred dark sweet cherries work well; if using fresh, pit them before simmering to create the filling.
- → What is kirsch and can it be omitted?
Kirsch is a cherry brandy that adds depth to the filling but can be omitted for an alcohol-free version without affecting texture.
- → How long should the dessert chill before serving?
Chilling for at least one hour allows flavors to meld and the layers to set, enhancing texture and taste.