 Save to Pinterest
 My friend Marcus showed up at my apartment one rainy Saturday with a container of Mississippi mud pie from some bakery in New Orleans, and I remember thinking it was absurdly theatrical—three bold layers stacked like edible architecture. One bite and I understood the fuss. I spent the next week trying to reverse-engineer it in my kitchen, learning that the magic wasn't just about chocolate (though there's plenty of that), but about texture—the way a fudgy brownie base melts into silky pudding, crowned with clouds of whipped cream. Now whenever I make this, the smell of baking chocolate fills my whole apartment, and neighbors start mysteriously appearing at my door.
I made this for a dinner party once where everything went slightly sideways—I forgot to chill the pudding layer long enough, and it was starting to slide when I spread the cream on top. Instead of panicking, I just slid the whole thing back into the fridge for an extra thirty minutes, and somehow that accident made it more stable than usual. My guests had no idea, and when I cut into it, the layers held perfectly. That's when I realized this dessert is actually pretty forgiving if you just give it time.
Ingredients
- Unsalted butter (120g): Use real butter here—it's the foundation of your brownie layer, and good butter makes a difference in both flavor and texture.
- Granulated sugar (200g for base, 100g for pudding): Keep these separate; the pudding sugar helps thicken the chocolate mixture while creating that silky mouthfeel.
- Eggs (2 large for base, 2 yolks for pudding): The whole eggs create structure in the brownie; the yolks enrich and thicken the pudding without making it grainy.
- Vanilla extract (1 tsp base, 1 tsp pudding): Don't skip this—it rounds out the chocolate and prevents the dessert from tasting one-dimensional.
- All-purpose flour (65g): Measure by weight if possible; too much flour makes the brownie dense instead of fudgy.
- Unsweetened cocoa powder (30g base, 30g pudding): Get good cocoa powder—it's half your chocolate story, and cheap cocoa tastes chalky.
- Salt (¼ tsp base, ¼ tsp pudding): Salt amplifies chocolate flavor, so measure it; it's not optional flavoring.
- Cornstarch (2 tbsp): This is your pudding's backbone—it creates that silky, not-too-thick consistency without eggs making it rubbery.
- Whole milk (480ml): Full-fat milk matters for richness; skim milk will taste thinner and less luxurious.
- Bittersweet chocolate (60g): Chop it small so it melts evenly into the pudding; dark chocolate adds depth that cocoa powder alone can't achieve.
- Heavy whipping cream (360ml): Cold cream whips better, so keep your bowl in the freezer for five minutes first.
- Powdered sugar (2 tbsp): Use powdered sugar for the cream, not granulated—it dissolves instantly without making the cream gritty.
- Chocolate shavings or cocoa powder for garnish: This final touch is what makes people lean in and take that first bite.
Tired of Takeout? 🥡
Get 10 meals you can make faster than delivery arrives. Seriously.
One email. No spam. Unsubscribe anytime.
Instructions
- Warm your kitchen and set up:
- Preheat your oven to 180°C (350°F) and grease your 23cm pie dish thoroughly—cocoa dust from the brownie will stick to dry spots. Having everything ready before you start mixing is the difference between a smooth process and scrambling mid-bake.
- Build the brownie base:
- Melt the butter and whisk in sugar, eggs, and vanilla until the mixture looks pale and fluffy, then sift in the dry ingredients and fold gently until just combined. Stop stirring the moment you don't see streaks of cocoa—overmixing makes the brownie tough.
- Bake until barely set:
- Spread the batter into your prepared pan and bake for 20-22 minutes; the toothpick should come out with moist crumbs, not clean. Remember, this layer continues to cook as it cools, and you want it fudgy, not cake-like.
- Let the base rest completely:
- This is not optional—set a timer for at least 30 minutes, or the warm brownie will cook your pudding layer unevenly and create a weird film on top. Patience here pays off.
- Start the pudding magic:
- Whisk sugar, cocoa powder, cornstarch, and salt in a saucepan, then slowly add milk while whisking to avoid lumps. Cook over medium heat, stirring constantly, until it thickens and you see a few bubbles breaking the surface—this takes about 5-7 minutes and you'll feel the wooden spoon suddenly have more resistance.
- Temper the eggs carefully:
- Beat the yolks in a small bowl, then slowly drizzle in a few spoonfuls of hot pudding while whisking constantly—this prevents scrambled eggs in your dessert. Once the yolks are warm, whisk the entire mixture back into the saucepan and cook for 2-3 minutes more, stirring to prevent sticking.
- Add the chocolate and cool:
- Remove from heat and stir in chopped chocolate and vanilla until completely smooth and glossy. Let it sit for 10-15 minutes, stirring occasionally, so it thickens slightly before you pour it onto the brownie.
- Layer and chill the first time:
- Pour the pudding over the cooled brownie base, then press plastic wrap directly onto the surface to prevent a skin from forming. Chill for at least one hour—or overnight if you're making this ahead, which I always recommend.
- Whip the cream with cold equipment:
- In a chilled bowl, beat heavy cream, powdered sugar, and vanilla until soft peaks form—this takes 2-3 minutes and the peaks should curl at the tips, not stand straight up. Stop here; overwhipped cream becomes butter, and that's a different dessert.
- Finish and final chill:
- Spread the whipped cream over the chilled pudding layer, garnish with chocolate shavings or a light dusting of cocoa powder, then chill for at least 30 minutes so the layers set and the cream stays fluffy when you slice.
 Save to Pinterest
 I served this to my parents one Sunday, and my dad—who usually just eats dessert without comment—asked for the recipe and made it the following week. He called me afterward to say it reminded him of some fancy place he took my mom on their anniversary years ago, and I realized then that this pie doesn't just taste good; it carries a kind of elegant, unrushed feeling that makes people slow down and actually enjoy their food.
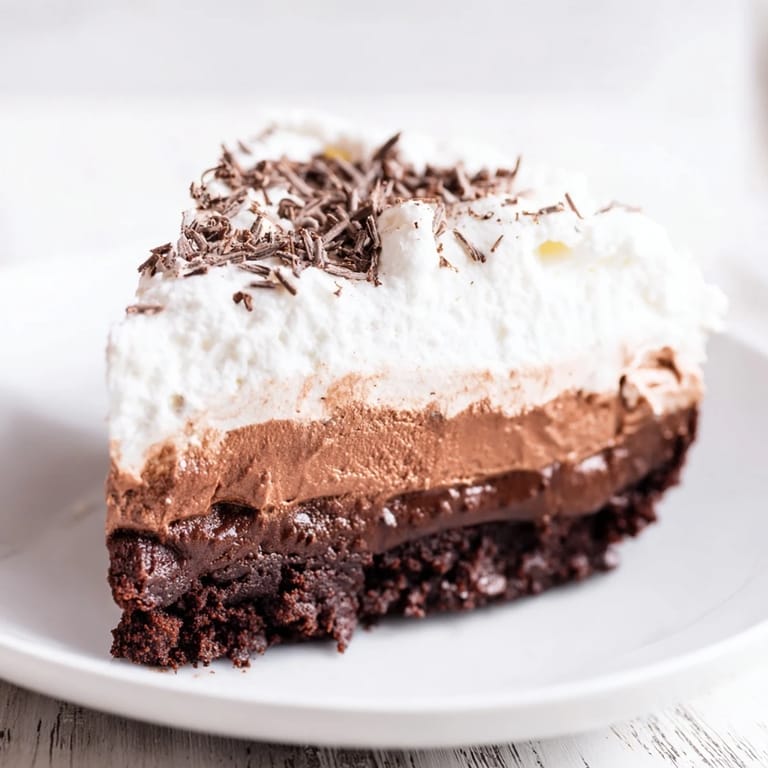
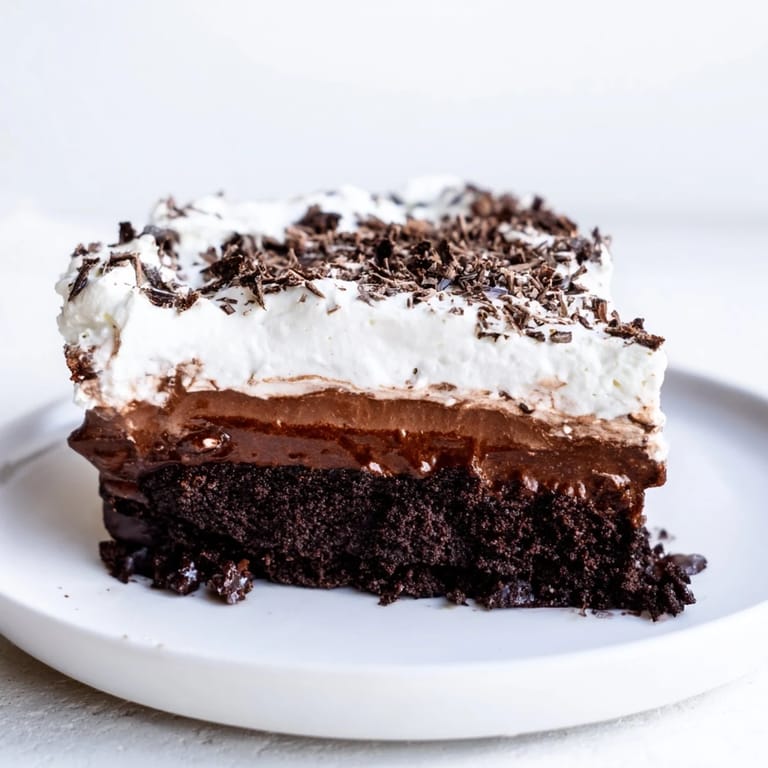
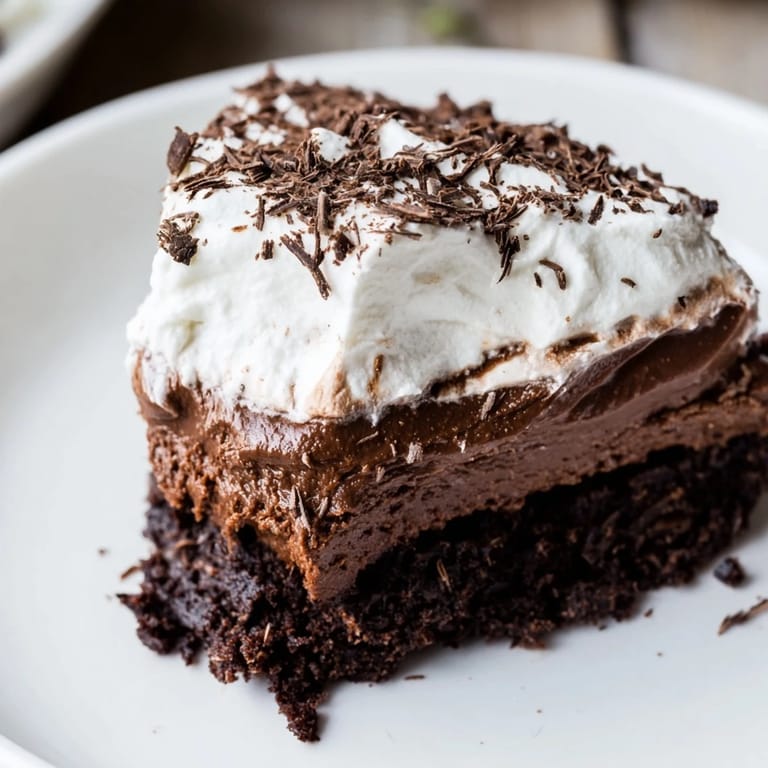
The Three-Layer Philosophy
This dessert is interesting precisely because it refuses to be one thing. The brownie layer gives you that fudgy, almost dense chocolate hit—it's substantial, almost bitter-sweet. The pudding middle is a complete textural shift: silky, spoonable, chocolate-forward but mellowed by milk and tempered with sugar. Then the whipped cream on top is air and lightness, like palate-cleaning clouds. Together, they create this journey across your mouth, and that's why people remember eating it.
Making It Your Own
The base recipe is solid, but this dessert rewards small experiments. Some people add a layer of chopped pecans or walnuts between the brownie and pudding for crunch—toast them lightly first so they stay crisp instead of getting soggy. Others use dark chocolate (70% cacao) in the pudding for extra intensity, though this needs a touch more sugar to balance. I once added a tablespoon of espresso powder to the cocoa mixture and it deepened the chocolate flavor in a way that felt sophisticated without being obvious.
Serving and Storage
This pie holds up beautifully in the refrigerator for up to three days, and honestly, the flavor actually improves slightly as everything melds together. Slice it with a warm, dry knife—dip the blade in hot water and wipe it clean between cuts so you get clean edges instead of chocolate smearing everywhere. Pair it with strong coffee, cold milk, or a glass of tawny port if you're feeling fancy; the acidity or bitterness cuts through the richness perfectly.
- Make this a day ahead so you're not stressed when guests arrive—it tastes better anyway.
- Keep any leftovers loosely covered in the fridge; exposed whipped cream picks up other flavors.
- Cold slices are divine, but if your kitchen is warm, let each slice sit at room temperature for five minutes so the flavors really sing.
 Save to Pinterest
 Mississippi mud pie is the kind of dessert that justifies all the small steps and careful timing because the result feels like something you couldn't possibly have made yourself, even though you absolutely did. It's worth making again and again.
Frequently Asked Recipe Questions
- → How long should I chill the dessert before serving?
Chill the dessert for at least one hour after adding the pudding layer, then an additional 30 minutes once the whipped cream topping is spread. This ensures proper setting and flavor melding.
- → Can I use dark chocolate for the pudding layer?
Yes, using dark chocolate enhances the richness and depth of flavor in the pudding, offering a more intense chocolate experience.
- → What type of pan is best for baking the base?
A 23 cm (9-inch) pie dish or springform pan works well to evenly bake the fudgy brownie base and allow easy removal after chilling.
- → Is it necessary to press plastic wrap directly onto the pudding layer?
Pressing plastic wrap onto the pudding's surface prevents a skin from forming and keeps the texture smooth before chilling.
- → Can nuts be added to the dessert?
Yes, adding chopped pecans or walnuts over the brownie base provides a delightful crunch and complements the creamy layers.